
A RESTful (or REST for short) API is an architectural style for an application program interface (API) that uses HTTP requests to access and use data. That data can be used to GET, PUT, POST and DELETE data types, which refers to the reading, updating, creating and deleting of operations concerning resources (Gillis). To consume a REST API simply means to use any part of it from an application.
The simplest form of an HTTP request is certainly GET without parameters which is usually used to retrieve all entries offered via particular endpoint. In the following tutorial I will be looking at creating an ABAP program which consumes a REST API and displays all the entries retrieved as a HTML page.
Getting Started
Most of the coding will be done in Eclipse with ADT, but the entire process is as easy to follow when one is using SAP GUI tools as well. Select File / New / Other, and then type in “program” to filter out the results; select ABAP Program to create one. The result can be seen on Screenshot 1.
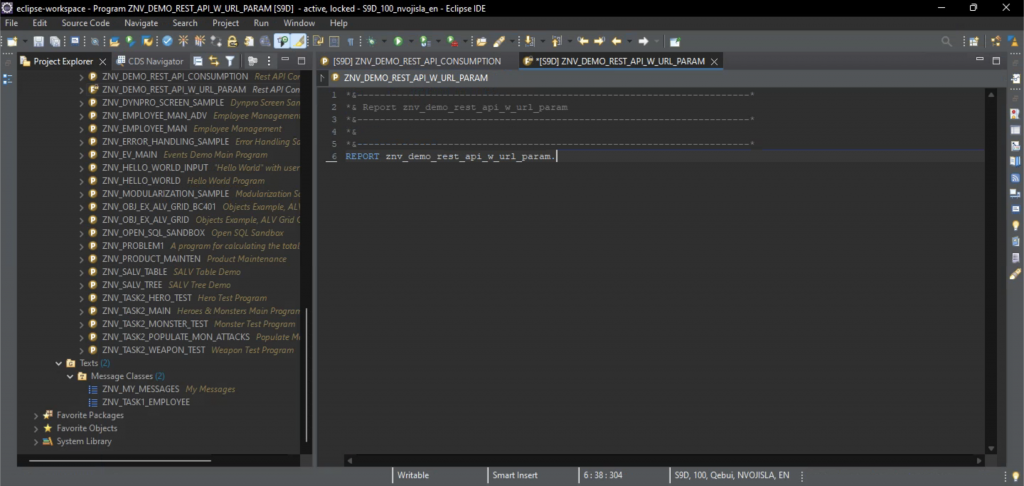
Define a selection screen with a single parameter of type string (Screenshot 2).
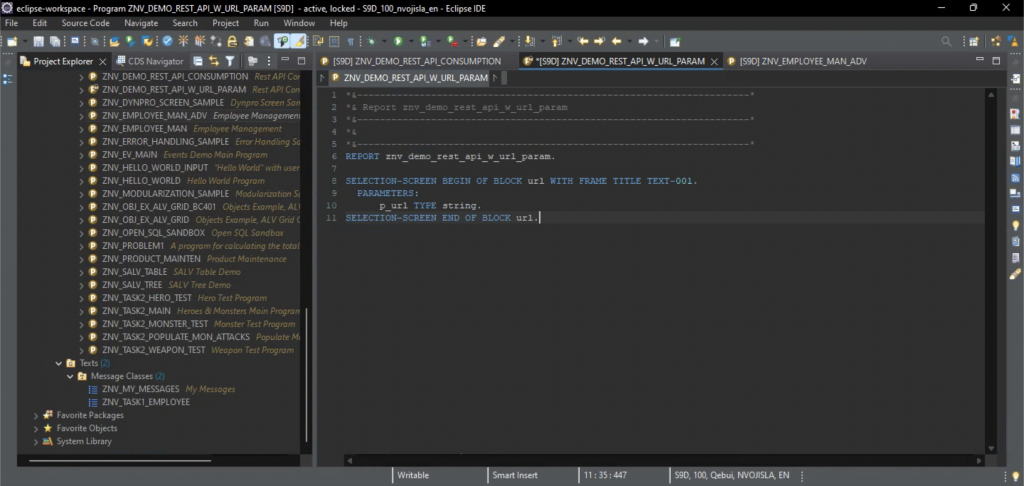
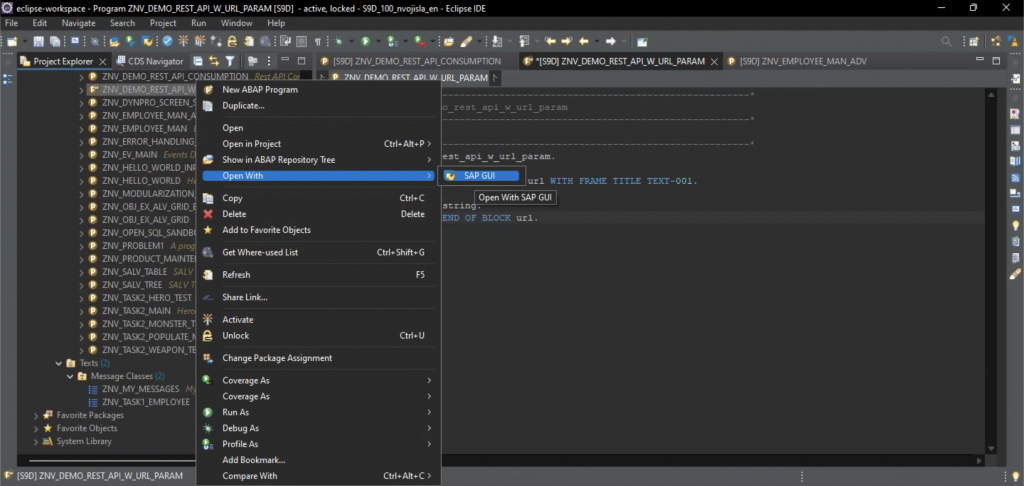
In order to get the selection screen frame caption and the parameter label open the program with SAP GUI (Screenshot 3).
Head over straight to the Text Elements page (Screenshot 4).
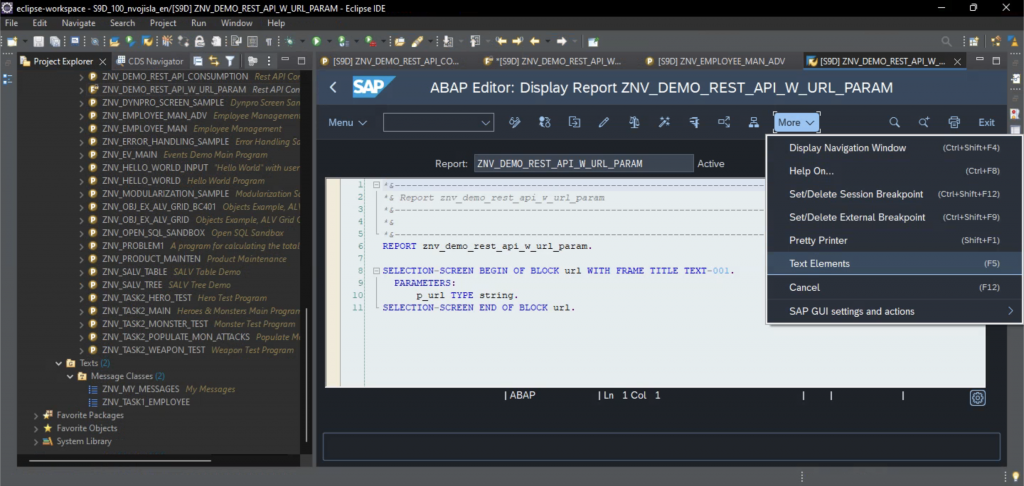
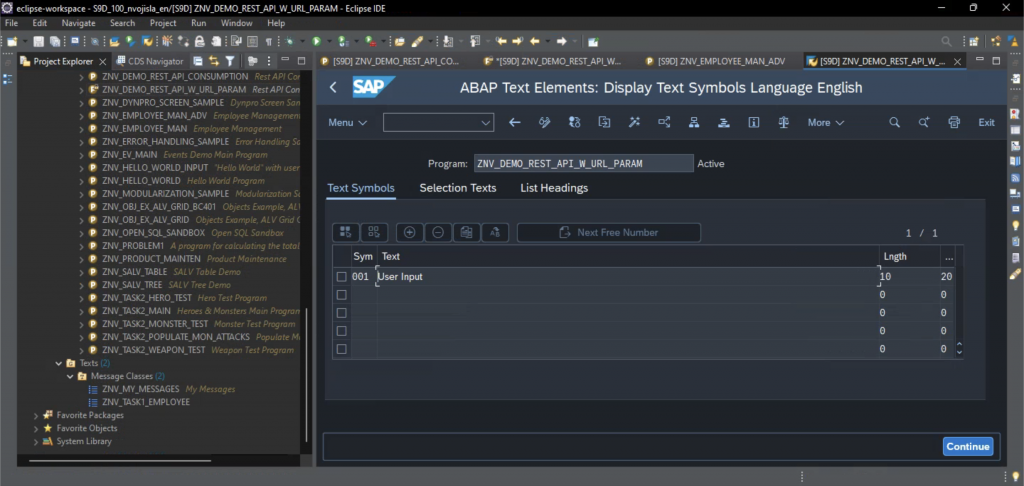
Add the entry 001 into the Text Symbols table with value “User Input” (can be anything really). The filled out table can be seen on Screenshot 5.
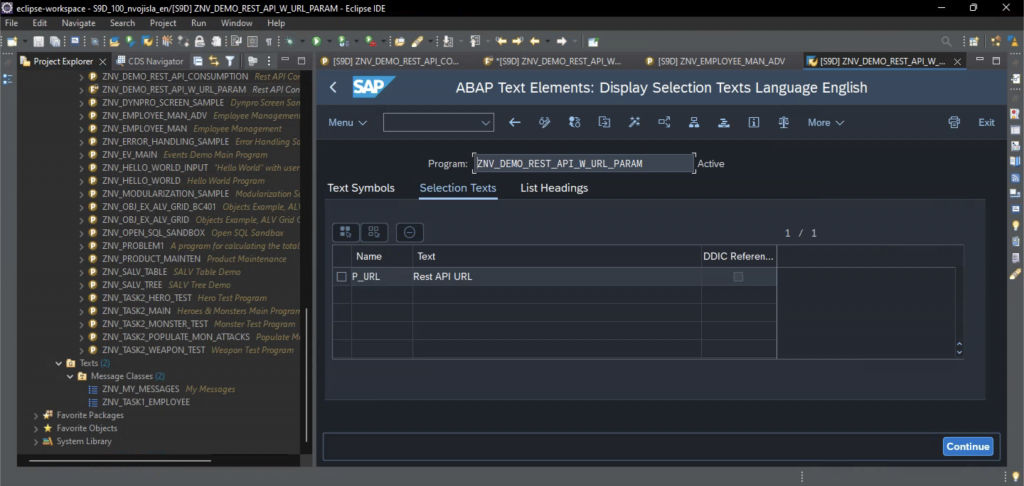
Now, head over to the Selection Texts tab and change the value of P_URL entry to “Rest API URL” (again, it can be anything). Check Screenshot 6 for comparison.
This concludes the initial setup, thus letting us move on to consuming the REST API itself.
Consuming the REST API
The basic idea, which is by no means exclusive to ABAP, comes down to following five steps:
- Create an HTTP Client Object
- Make a Request
- Ask for a Response
- Get the Data
- Display the Data
Create an HTTP Client Object
To create an HTTP client object in ABAP one should make use of cl_http_client class and its static method create_by_url (there are other options as well but this one suits us best in this case).
In order to make use of Eclipse’s advanced assistance features, start typing the name of the class and then hit CTRL+Space – an auto-complete list should pop up letting you choose one of the options available based on what you typed down already. Not only does this work with methods as well, but there is an additional feature of using SHIFT+Enter to select the method, which then types out the entire signature, i.e. reveals all the IMPORTING, EXPORTING, EXCEPTIONS and other types of parameters that the method works with (Screenshot 7).
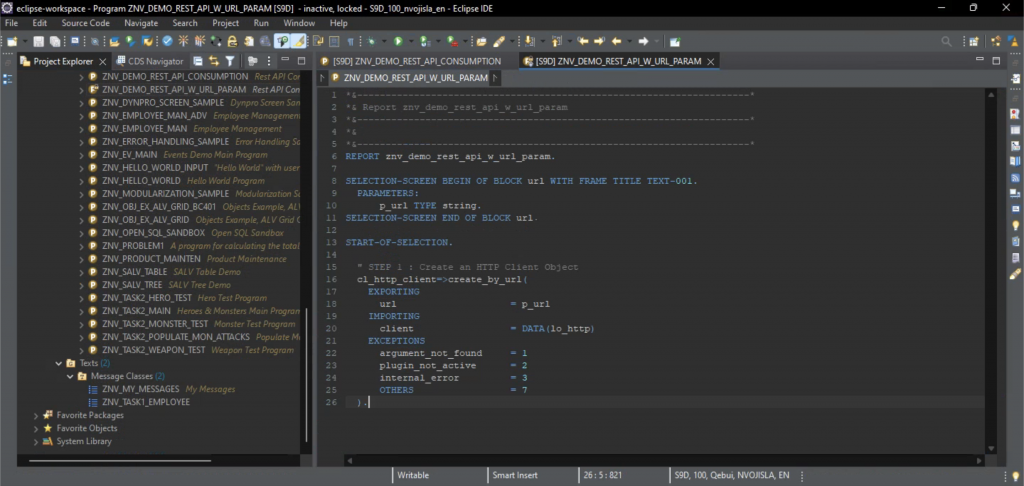
The method create_by_url takes in the URL of the REST API we wish to consume (fed in via parameter on the selection screen in this case) and returns the HTTP client object it creates (lo_http in our case). The exceptions stated in the signature can then be evaluated and properly handled, however that is out of the scope of this tutorial.
Make a Request
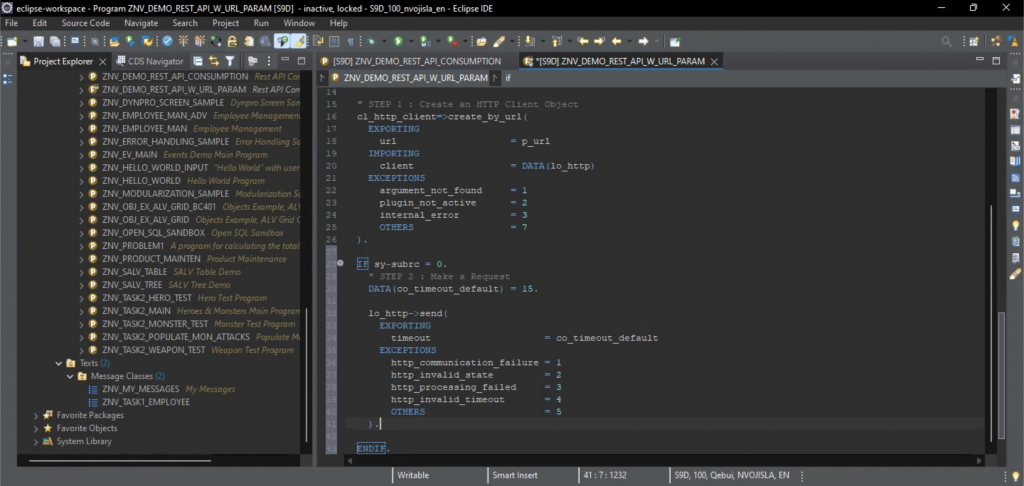
The IF sy-subrc = 0. check ensures that the program is terminated in case any errors occur.
If, on the other hand, all went well we now have our HTTP client and we are in position to make a request. For this we utilise the send method (again, CTRL+Space and SHIFT+Enter make our lives easier in Eclipse) which only cares about a timeout value, which is here set to 15 but can be any other value that works as well. The result can be seen on Screenshot 8.
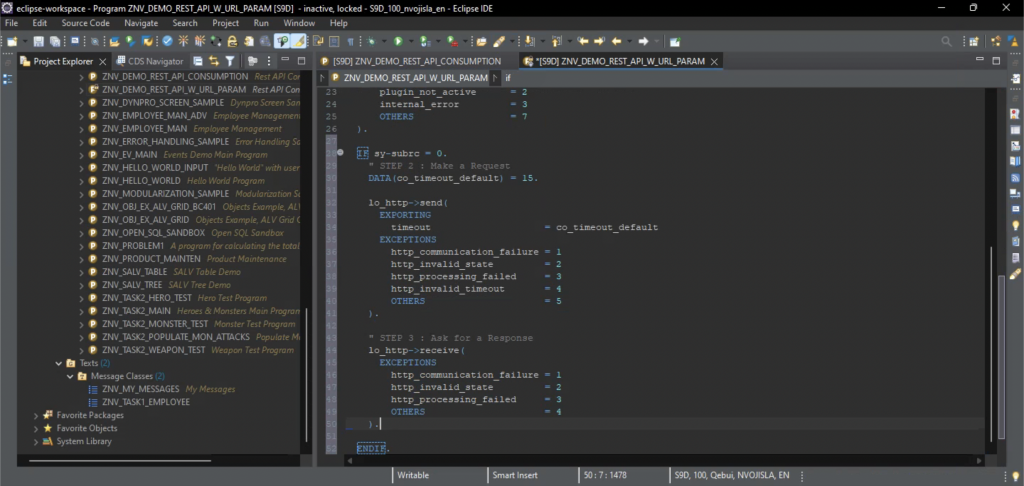
Ask for a Response
Now that the request has been made, we should ask for a response – this is achieved through method receive which takes no input and returns no output values (Screenshot 9).
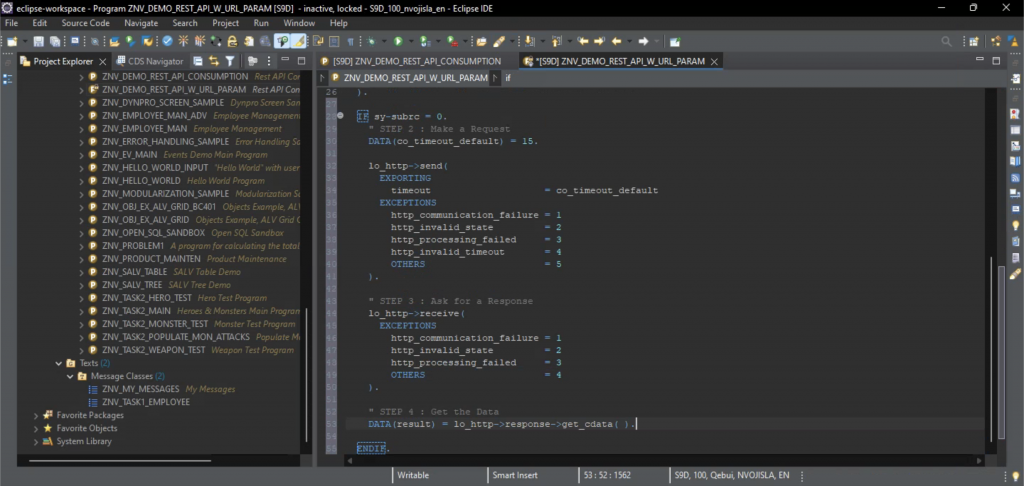
Get the Data
Data is accessed via response, which is a field of the lo_http object. The get_cdata method used is the way of getting the data in character format, i.e. as a string. Since what we will be receiving from the API is a JSON object, this is exactly what we want (Screenshot 10).
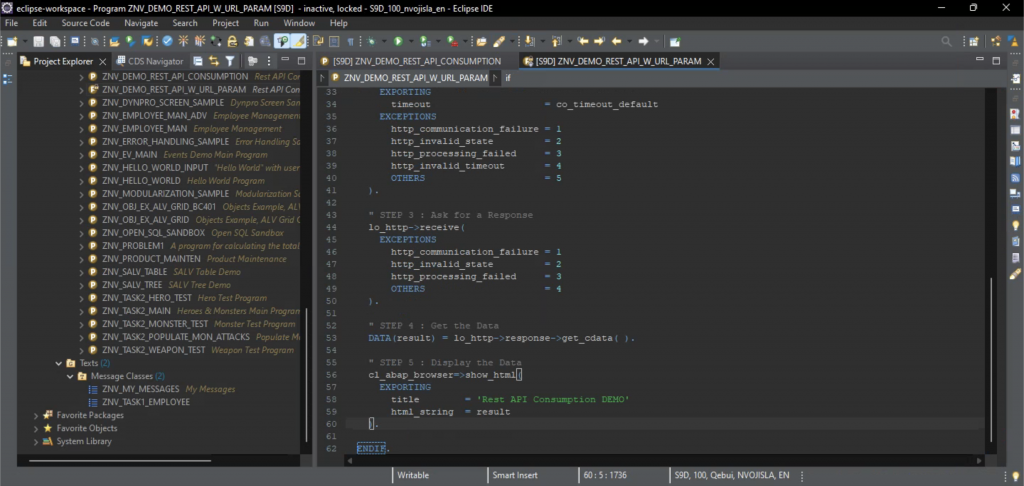
Display the Data
The data is displayed using the cl_abap_browser class and its method show_html. The method signature once fully displayed in Eclipse is pretty self-explanatory, however of its myriad of input parameters we will only be using two. This gives us perhaps not the fanciest, but certainly quite serviceable display of the JSON objects retrieved (Screenshot 11).
Example of REST APIs Ready for Consumption
Some of the URLs I have used are listed below:
- https://jsonplaceholder.typicode.com/posts
- https://jsonplaceholder.typicode.com/users
- https://jsonplaceholder.typicode.com/albums
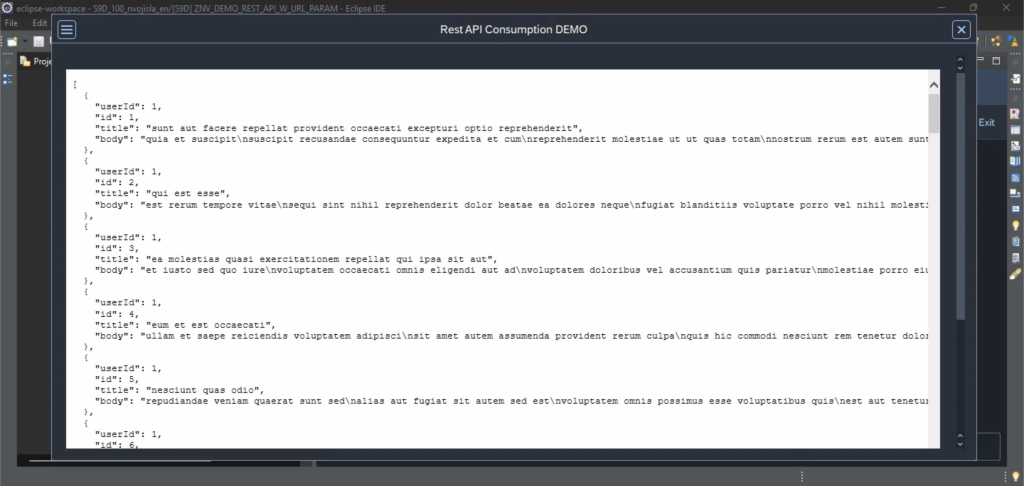
The final result can be seen on Screenshot 12.
References
Gillis, Alexander S. “REST API (RESTful API)”. TechTarget, 11 Oct. 2022, https://www.techtarget.com/searchapparchitecture/definition/RESTful-API
Citation style is MLA (9th ed.).
